Background

Friday, December 28, 2012

Happy Holidays!

Good Morning Blogger Friends!  I hope the Holidays are going well for everyone, and that lots of crafty goodies found their way under each of your trees!  I have been neglecting this blog in a BIG way lately, and I apologize for that!  It's been an exciting few months since I last posted.  Hubby and I found out that we are expecting #2 at the end of March - we're so excited - We're having a BOY!  He came with his own set of symptoms, namely the 2 months I was down with all-day sickness and nausea.  Thank goodness that went away, and everything has been great since.  I just started my 3rd trimester and I'm getting huge :)  I can't wait to meet him!

My Mom's birthday is today.  She loves the homemade cards that I make for her, and she just gave me the new Teresa Collins December 25th Cricut cartridge for Christmas, so I wanted her to see what pretties I could make with it - Here's how it turned out:

I really like how this card turned out - it's the perfect wintery card.  We're meeting her for dinner tonight - I hope she likes it!  I hope to upload more projects over the next couple of days - wish me luck!  If you don't see much of me come Spring, you'll know why... My OTHER hobby will have taken over for a while :)  HAPPY NEW YEAR TO ALL!

About This Card:
Card Base - Blueberry Sky Papertrey Ink
Navy & White Mats - Stash
Embossing Folder - Cuttlebug from Winter Wonderland 6-Pack
Snowflake Flourish - Teresa Collins December 25th - Cut at 4"
Sentiment - My Pink Stamper Winter Wishes on Spellbinders Labels 4
Pearls, Stardust Stickles, Midnight Stickles - Stash

Thanks for looking!

Thursday, July 26, 2012

Beachy Birthday

Happy Thursday!  So, as I am working to increase my stash of greeting cards at home, I figured it's summer, I need birthday cards, so let's make 'em!  I was inspired by challenges this week from both Die Cuttin' Divas & Creative Cutter Room to make a beach-themed card, so here's what I came up with:
The layout was inspired by a card I found on pinterest (who doesn't love pinterest?). It's simple, summery, and best of all - we have a ton of August birthdays in our family so this one will come in handy!  If you're feeling beachy this week, come play along at this week's challenges!


Entering this card in:
 Die Cuttin' Diva's Challenge #75 - Summer Fun
Creative Cutter Room - Summer Fun

About this card:
Kraft Cardstock - Papertrey Ink
Navy/White Mats - Stash
Distressed Stripes Embossing Folder (Cuttlebug)
Twine - Navy/white & Gold/White - Stash
Die Cut Starfish & Seashell - Cut from the Pack Your Bags Cricut cartridge using Bazzill Bling Cardstock
Sentiment - Pink by Design Summer Vacation

Saturday, July 21, 2012

I Wood Like to Thank...

I know - My puns are the worst.  I get it honest... my family has 'pun-wars' over Thanksgiving dinner... Don't judge, please!  Today's pun was inspired by this card:
Here's the back story - About a month ago, a strong storm knocked over a rather large tree in our back yard.  Temperatures that week were averaging 90-100 degrees... it was HOT!  I posted pictures on Facebook of our fallen tree, and within an hour, a friend from church commented and offered to bring his chainsaw over and  help us remove it.  We were so grateful for him (and his son, who also came along to help in the incredible heat), so I want to send him a thank you card.  I absolutely COULD NOT pass up the opportunity to use my wood grain embossing folder (The Paper Studio).  I knew that bugger would come in handy some day :)  While I'll be sending him this card tomorrow, I hope I also have the opportunity to pay it forward.  Being on the receiving end of such a random act of kindness is a feeling like no other, and I hope to pass it along to someone soon!

Oh, and I just got the 'perfectly penned' sentiment stamp set from Stampin' Up, and I love it (Thank you, Kathy) in case you were wondering where the stamp came from.  Have a wonderful weekend everyone!

About this card:
Kraft/Brown Cardstock - Papertrey Ink/Stash
Hemp cord
Sentiment - Perfectly Penned - Stampin' Up (Stamped in Stazon Timber Brown)
Embossing Folder - Wood Grain - The Paper Studio
Distressing - Vintage Photo - Ranger
Metal Pearls - Making Memories Stash

Sunday, July 15, 2012

Using Wild Card 2

I have to admit - the pictures on the Wild Card 2 Cricut Cartridge cover really don't do this cartridge justice.  The images look like a bunch of pictures from an 80's video game.  You have to look through the book to really be inspired.  This cartridge has TONS of potential!  I'm not a huge fan of the sentiments that they included with the cards, but I have tons of stamps that will make these cards perfect.  Here's my first crack at using Wild Card 2:
I love how the card base is in front of the clouds, giving this card lots of dimension.  I inked a few of the edges, added pearls, stickles and glossy accents.  The finished card is about 5" tall.  I can't wait to make more of these shaped cards - if you have this cartridge and haven't tried it yet, break it out and start playing with it - you won't regret it!

Altered Paint Can

I was in a swap where we had to decorate a mini paint can, and stuff it full of goodies and send it to a partner.  My partner gave me a few hints about her style and preferences, and the one thing she said that stood out to me was when she said she liked, "Black and white with a splash of color".  Here's what I made for her:
I used My Mind's Eye paper from their Lush line, and used adhesive pink pearls to accent the floral print.  The black ribbon is seam binding - I have really enjoyed using seam binding on projects - I'm glad someone introduced it to me  not too long ago.  Pretty simple and elegant - I hope she loves it!

Tuesday, June 26, 2012

Alive and Crafting!

My goodness - it's been over 3 months since I've posted!  Life just took me for quite a ride, but I'm back now and I hope to keep up with this blog a little better for the rest of the summer :)  The last 3 months have been filled with birthdays, anniversaries, vacations, work reorganizations, etc.  FORTUNATELY I was able to continue to make lots of goodies, UNFORTUNATELY I was unable to post most of them.  Here are some of the things that kept me busy:

1.) My daughter turned 3 in April, and we had 30+ kids (gulp) come to her party!  As favors, I made each of the kids a personalized water bottle:
I found these bottles at Michael's for $1 each!  I cut each of their names out in white vinyl using my Cricut, and added different colored spots to each to make each one unique.  They were a big hit, especially with the kids who have 'unique' spellings of their names!  This started my newly-found vinyl obsession!

2.) My niece Danielle turned 5 in April, and she loves the Littlest Pet Shop figurines.  I wanted to make her something to hang in her room:
I had to get really creative to make that little cat - I used the Create a Critter cartridge fror most of it, then substituted ovals for the eyes and used stickles to 'draw' in the eye features... Add a peachy Keen face and you have a Littlest Pet Shop!


She loved it :)

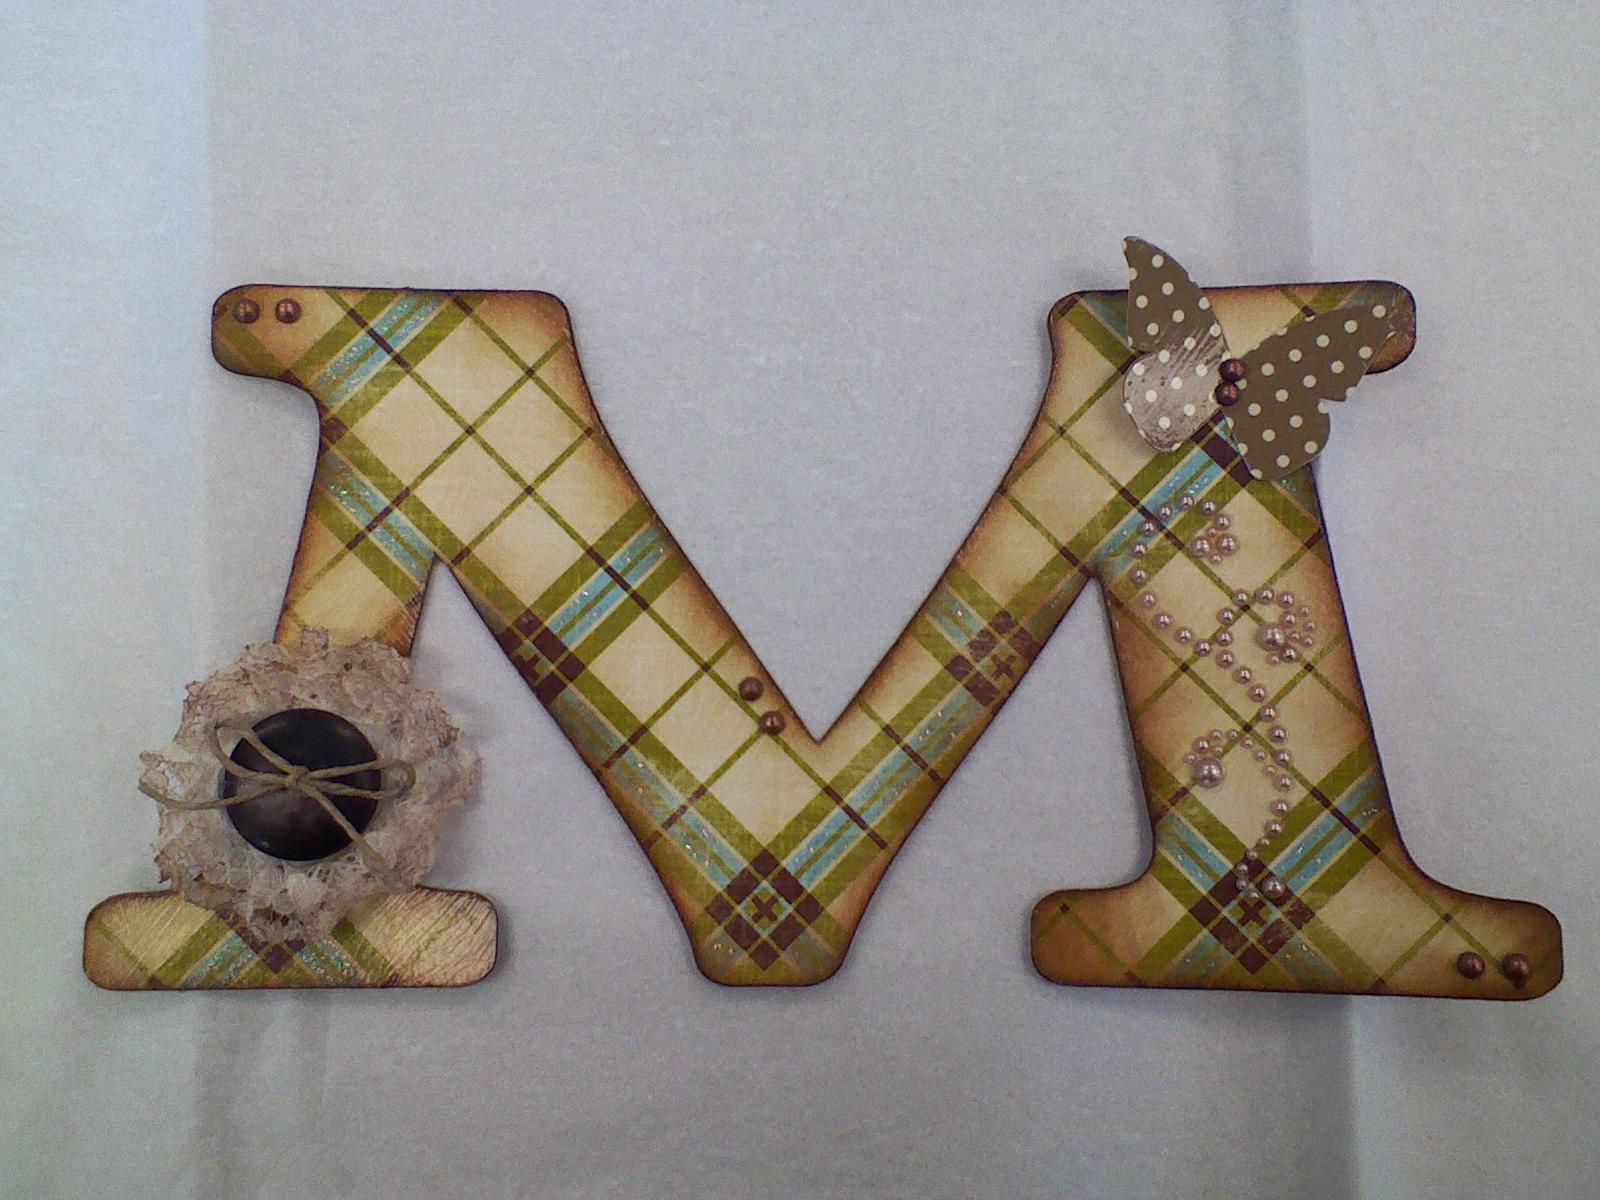
3.) My husband and I were watching the movie "Courageous" one night (Must See for ALL parents), and the little girl in the movie had a sign on her wall that said this:
My husband made the comment that he'd like to have that saying hung in our daughter's room, so I made a mental note and created the above.  I took an unfinished wood plaque from ACMoore, painted it, ModPodged it, and added the vinyl letters/designs to in, and finished it off with a little bling.  It matches the colors of our daughter's room perfectly - both daddy and daughter loved it.

4.) My final highlight of the past 3 months was this banner:
I never made a banner before, but I was in a swap where I needed to make something homemade, and the first item on my partner's list was a 'create' banner in lime green/black.  I love how it turned out!  I used my Ribbons & Rosettes cartridge for the first time, and while those little rosettes are a challenge to fold, they looked awesome!
I hope my partner is loving her new banner!

Ok - I have a couple of t-shirt ideas in my head, along with some more vinyl ideas, so hopefully you'll be seeing some of those from me soon.

In the meantime, I hope everyone in enjoying their summer!

Monday, March 5, 2012

Non-Card Fun

Hi Everyone... I just can't seem to catch up and do things I want to these days... such is life :)

I made the following for a friend who I am swapping with on another site:
This was my first attempt at altering something totally from scratch.  I started with a cereal box, and used that as my base.  I cut the M from the cereal box, using the Rolly Polly font on the Plantin Schoolbook cartridge.  Then I cut the same M out of some Fancy Pants cardstock I got in a grab bag, and glued them together.  (Lesson learned - - - Next time I will flip one of the images on my gypsy, so I can cover the printed side on the cereal box.  This M says Cheerios on the back of it!)

I distressed the edges with Vintage Photo Distress Ink, and put 2 coats of ModPodge on it.  I used the matte ModPodge for the base coat, then used the glossy ModPodge on top of that - I like the effect it gave the finish.  I also ModPodged the butterfly and used a recollections pearl flourish to embellish the right side.  The left side button was fun to make!  I took some lace and hot-glued folds into it.  then I formed a circle out of it (think rosette folding), and hot glued it onto the back of the brown button.  I distressed the lace with Vintage Photo Distress ink, and tied some hemp cord in a bow through the button holes.  I had to use my ATG gun/tape to get it to stick to the 'glossy' surface - it's not budging, I guarantee it!  I placed a couple of vintage pearls around a few of the edges, and there you have it!

I hope my partner likes it!  The finished size is 6"tall by 10" wide.  I can't wait to make more of these, especially for some kids I know, to help decorate their bedrooms.

Try something new today - I did, and I loved it - Have a great, crafty day!

Tuesday, February 14, 2012

Back to School

Hello!  Wow - 2 weeks without a post... I'm really slipping!  To prove I haven't really been slacking, I have 2 projects to show you that I'm excited about.

First, another card.  It looks very similar to my 'monochromatic' card from a couple of weeks ago:
I am having so much fun with the LUSH line of paper from My Mind's Eye!  My babysitter is getting married this coming weekend, and her wedding colors are black and white with a hint of red.  The card is 5"x5", and the 'doors' are each 3" so they overlap a little bit creating a more dramatic opening.

I am entering this card in Die Cuttin Divas "Pick at Least 2 Colors" Challenge this week!
ETA: My card did not win this challenge, but I was one of 3 cards chosen for their showcase - How exciting!!! See the showcase here: Die Cuttin Divas

The Skinny on this card:
All Cardstock - LUSH by My Mind's Eye
Black CS - Papertrey Ink Pure Black
Sentiment Stamp - Fiskars stamped in Memento Tuxedo Black
Pearl Trim - Joann's (bought by the yard)
Red Pearls - Stash

My next project is my first submission for an online COPICS class that I am taking.  It just started today, and our first assignment was to color 'something' for the instructors to see, so that they can offer insight and get a sense of what skills we are needing to work on.  Here's my initial submission:
Angel Anya

I was excited about how her hair turned out, but I need help on that dress and the wings.  The instructors said that we will be coloring these same images at the end of the class again, so we can see how much we have improved.  I'm hoping to share my journey with you here - if I don't have too much homework, I'll be sure to post often!  It's a 3 week class with 18+ lessons, so I plan on being pretty busy!

Sorry no pink project to share, but I do hope everyone has a WONDERFUL Valentine's Day!

Sunday, January 29, 2012

Sunday Night Creation

Good Evening!

By this time on a Sunday night, I'm usually exhausted.  Not this Sunday night though - a card I saw in an old Stampin' Up catalog had been floating through my mind all day, so I knew I had to hurry up and make it before I forgot my recipe :)  Here's how it turned out:
Another cricut-less cards!  Oh how my resolution is suffering... I'll make up for it next week - I already have ideas {insert mischevious laugh here}...

A couple of neat things I tried with this card were:
1.) Embossing only the bottom 1.5" of the card base
2.) Only gluing down 1 of the butterfly wings to give them a 3D effect

I left the inside blank for now - I'll stamp something in it once I know who it's going to.

Thanks for looking - Have a good night!

About this card:
Cardstock Base (4"x4") - Stash; Embossed with Floral Fantasy Cuttlebug Folder
Ribbons - Brown Base is seam binding; Beige Lace is from Stampin' Up
Patterned Paper - Fancy Pants - My Family / Mother 
Spellbinders Die - Lacy Squares
Light Blue Cardstock - Papertrey Ink - Spring Rain
Distress Inks - Vintage Photo & Stormy Sky
Butterflies - Making Memories Paper Reverie/Metallique
Pearls - Stash
Edges chomped with my awesome Corner Chomper

Saturday, January 28, 2012

Ahoy!

Ok - I really needed to get out of the funk that the last card left me in, so I did an about-face and created this:
I love the way it turned out - I got to try some new things with this card.  The faux stitching helps the layers look more finished, the glossy accents on the wheel make it look like polished wood, and the patterned paper is from Webster's Pages - I love their papers, but have never had the guts to cut into one till tonight - glad I did!

I'll be entering this card into the following challenges:
Cardz TV Challenge - "It's a Guy Thing"
Die Cuttin' Divas - "Buttons, Bows &/or Bling"
Birthday Sundaes - Challenge #40 - "Birthday Card w/ Sentiment on the Outside"

Thanks for looking - Have a GREAT weekend!

About this Card:

Cardstock Base - Papertrey Ink - Enchanted Evening
Patterned Paper - Webster's Pages - Yacht Club, Whale Watching
Cricut Cut - Wheel from Pack Your Bags, cut at 3.25", with added Glossy Accents
Sentiment - Pink by Design - Summer Vacation  stamped in Staz-on Timber Brown
Buttons, Bling, Ribbon, Hemp Cord - Stash

Wednesday, January 25, 2012

One of Those Days...

Ok, we all have that project that looked so cool in their minds, then really didn't pan out.
Exhibit A:

I don't know where it went wrong... scratch that... I don't know what's right about it.  The colors are not right, the frame layers didn't really line up, the distressing on the frame faded as it dried... Not my favorite card I've ever made.

HOWEVER... I did use 2 different cartridges on this card, so I can cross 2 more off of my Resolution List.  And I'm a HUGE fan of these tiny sentiment stamps that I got from Pink by design - they fit anywhere!  If nothing else, this 'eh' feeling is driving me to something great again.  Hopefully I can stay up late enough tonight to make something!  We'll see...

About this mess:

Card Base: Papertrey Ink New Leaf
Cricut Cuts - Frame - Elegant Edges cut at 3" & Flower - Cindy Loo Cut at 2"
Ribbon - Stash (Recollections)
Sentiment - Pink by Design
Stickles - Lime Green, Cotton Candy, Burgundy, Yellow
Distress Ink - Ranger - Scattered Straw

Thursday, January 19, 2012

Playing with LUSH

Good Evening...

I have a Cricut-less card to share with you tonight!  I bought some gorgeous My Mind's Eye papers from CropChocolate.com, and was inspired by one of the ladies on that website (Credit-StampinHampton) to create this card:
Which opens up to look like this:
I really like the look of mono-chromatic cards, and this line of paper is perfect for making them. I love birds, so I really wanted to make the bird (from the Finch cardstock) the centerpiece of this card - I love how it turned out!

I didn't have anyone special in mind when I made it, so I left the sentiment pretty generic.  I have this paper in about 8 different colors, so don't be surprised if you see more 'mono-chromaticism' from me :)  Sorry, it's late and now I'm making up words... Thanks for looking!

About this card:
Card Base - My Mind's Eye Lush Green Diamonds (11"x5" folded to 5"x5")
Solid Cardstock - Papertrey Ink Ripe Avacado
Patterned Cardstock - My Mind's Eye Lush Green Finch and Lush Large Green Polka Dot
Sentiment - Fiskars All Year Greetings
Ink - Ranger Distress Ink Forest Moss

Wednesday, January 18, 2012

Getting Squirrel-y

Hello again :)

I am REALLY excited to share this card with you, because I just love how it turned out!  I made this card to enter into the challenge going on right now over at Die Cuttin Divas.  The challenge is to make something with a squirrel on it (random fact - Squirrel Appreciation Day is 1/21).  Here's what I came up with:
The tag hiding behind the mat looks like this:
I had never heard of squirrel appreciation day before.  Honestly, I really don't like squirrels - they eat all of the good food I put out in my bird feeders. However, today I do need to be grateful to them for inspiring this cute card.   If you're feeling squirrel-y, hop over to Die Cuttin Divas and try their challenge this week - It'll be fun!

About this card:
Kraft Base 6"x6" (folded in half)
Patterned Paper - Sassafrass Lass - Count Me In
Die Cut Mats - Stash
Cricut Cut - Give a Hoot cut at 1.75"
Stickles - Cinnamon, Black Diamond
Pearl & Twine - Stash
Sentiment - My Pink Stamper Punny-licious
Distress Ink - Tea Dye

Friday, January 6, 2012

Winter is Setting In!

Hello everyone, and Happy New Year!

Here in the NorthEast, we've had our first 'cold' week of the Winter.  I didn't reach for my cup of hot chocolate though, instead, I grabbed my newest set of Pink by Design Stamps (Snowflakes) and set out to make a 'brrrthday' card for my nephew:
My crafting resolutions this year are to 1.) Use every cartridge I own at least once, 2.) Use as much as I can from my stash, and 3.) Make 2 or more of the same card at a time, so I have a supply built up.  Sound familiar?

For this card, I used the new "Snow Day" cartridge for the first time - it's really cute!  I distressed the edges of the snowball, stickled them, added a little shine to the boy's snowsuit and mounted him using pop-dots.  All of these supplies were from my stash.  1 cartridge down, (yikes... too many to count...) to go!

Stay Warm!

Supplies:
Card Base - Papertrey Ink - Blueberry Sky
Corner Chomper - Scallop
Cuttlebug Folder - Snowflakes
Cricut Cartridge "Snow Day" - Boy/Ball cut at 2.5" using Bazzill Bling Cardstock
Sentiment - Pink by Design "Snowflakes"
Ribbon/Flourish - Stash (Recollections)
Distress Ink - Chipped Sapphire (Edge of card), Broken China (Snowball)
Stickles - True Blue, Orange, Black Diamond, Cotton Candy, Waterfall & Icicle