Background

Monday, March 5, 2012

Non-Card Fun

Hi Everyone... I just can't seem to catch up and do things I want to these days... such is life :)

I made the following for a friend who I am swapping with on another site:
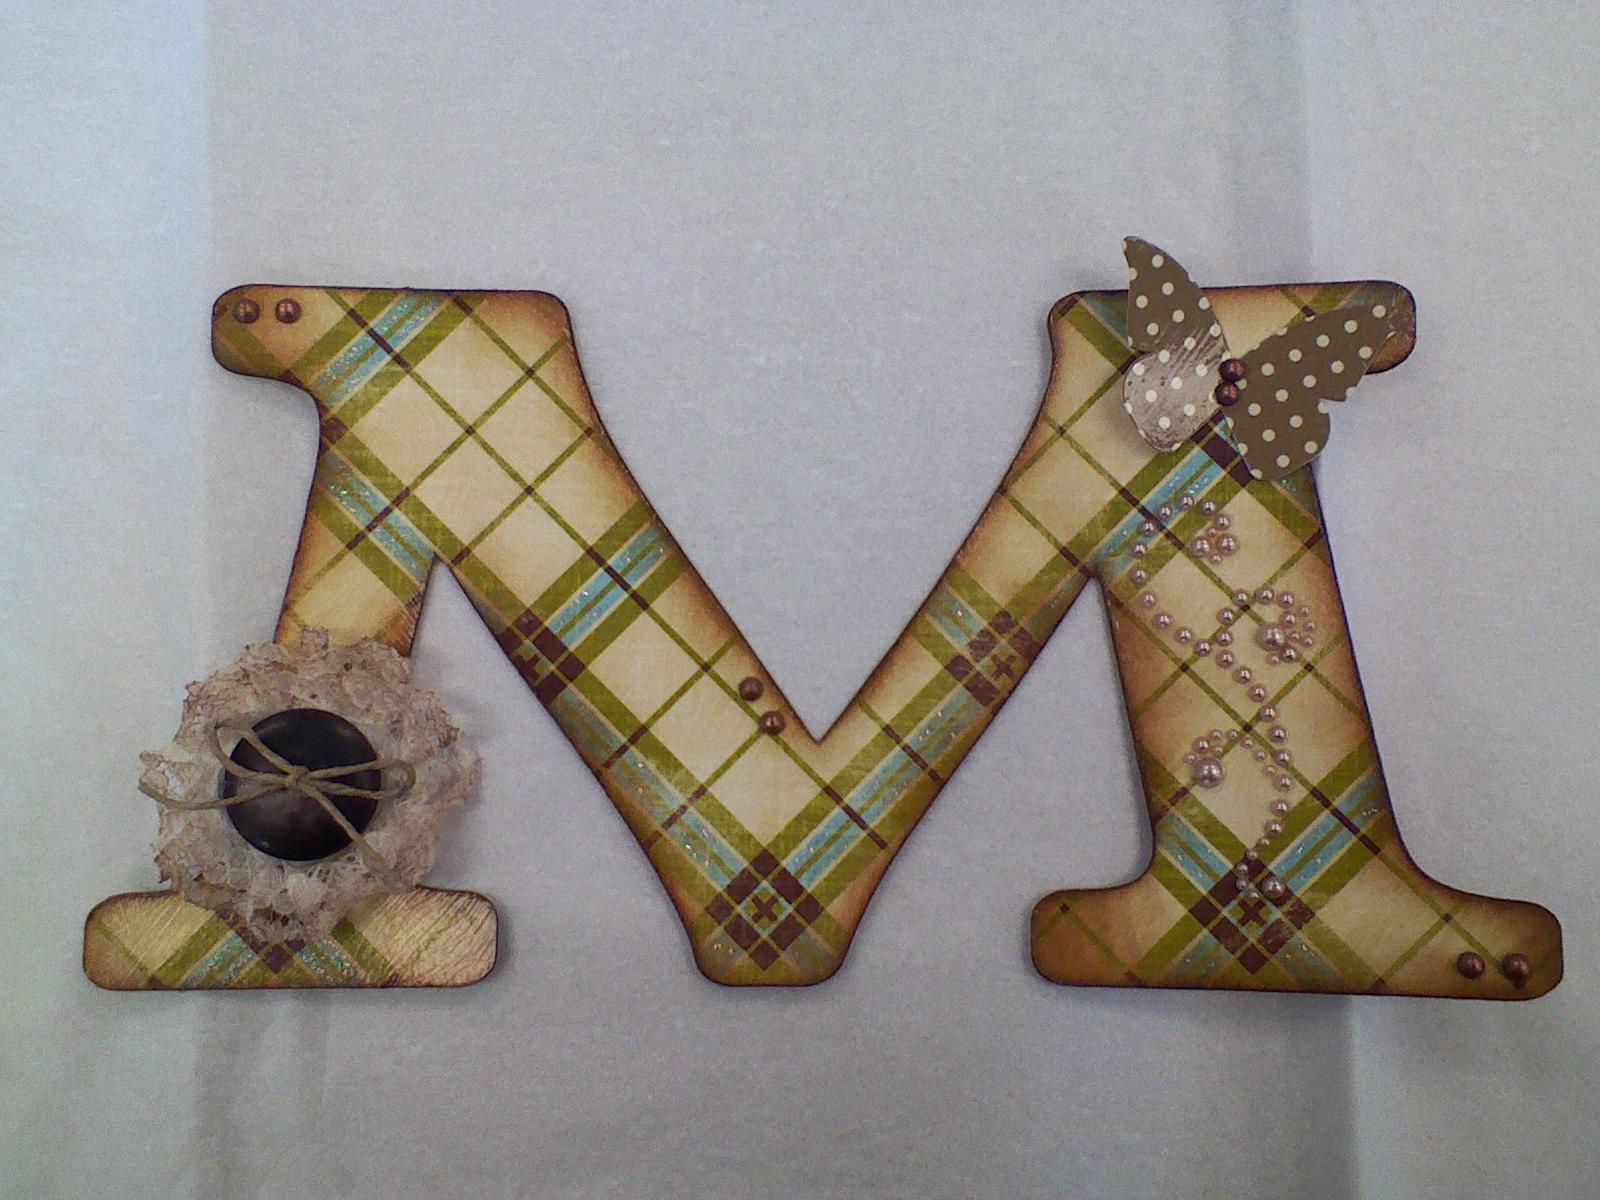
This was my first attempt at altering something totally from scratch.  I started with a cereal box, and used that as my base.  I cut the M from the cereal box, using the Rolly Polly font on the Plantin Schoolbook cartridge.  Then I cut the same M out of some Fancy Pants cardstock I got in a grab bag, and glued them together.  (Lesson learned - - - Next time I will flip one of the images on my gypsy, so I can cover the printed side on the cereal box.  This M says Cheerios on the back of it!)

I distressed the edges with Vintage Photo Distress Ink, and put 2 coats of ModPodge on it.  I used the matte ModPodge for the base coat, then used the glossy ModPodge on top of that - I like the effect it gave the finish.  I also ModPodged the butterfly and used a recollections pearl flourish to embellish the right side.  The left side button was fun to make!  I took some lace and hot-glued folds into it.  then I formed a circle out of it (think rosette folding), and hot glued it onto the back of the brown button.  I distressed the lace with Vintage Photo Distress ink, and tied some hemp cord in a bow through the button holes.  I had to use my ATG gun/tape to get it to stick to the 'glossy' surface - it's not budging, I guarantee it!  I placed a couple of vintage pearls around a few of the edges, and there you have it!

I hope my partner likes it!  The finished size is 6"tall by 10" wide.  I can't wait to make more of these, especially for some kids I know, to help decorate their bedrooms.

Try something new today - I did, and I loved it - Have a great, crafty day!

Tuesday, February 14, 2012

Back to School

Hello!  Wow - 2 weeks without a post... I'm really slipping!  To prove I haven't really been slacking, I have 2 projects to show you that I'm excited about.

First, another card.  It looks very similar to my 'monochromatic' card from a couple of weeks ago:
I am having so much fun with the LUSH line of paper from My Mind's Eye!  My babysitter is getting married this coming weekend, and her wedding colors are black and white with a hint of red.  The card is 5"x5", and the 'doors' are each 3" so they overlap a little bit creating a more dramatic opening.

I am entering this card in Die Cuttin Divas "Pick at Least 2 Colors" Challenge this week!
ETA: My card did not win this challenge, but I was one of 3 cards chosen for their showcase - How exciting!!! See the showcase here: Die Cuttin Divas

The Skinny on this card:
All Cardstock - LUSH by My Mind's Eye
Black CS - Papertrey Ink Pure Black
Sentiment Stamp - Fiskars stamped in Memento Tuxedo Black
Pearl Trim - Joann's (bought by the yard)
Red Pearls - Stash

My next project is my first submission for an online COPICS class that I am taking.  It just started today, and our first assignment was to color 'something' for the instructors to see, so that they can offer insight and get a sense of what skills we are needing to work on.  Here's my initial submission:
Angel Anya

I was excited about how her hair turned out, but I need help on that dress and the wings.  The instructors said that we will be coloring these same images at the end of the class again, so we can see how much we have improved.  I'm hoping to share my journey with you here - if I don't have too much homework, I'll be sure to post often!  It's a 3 week class with 18+ lessons, so I plan on being pretty busy!

Sorry no pink project to share, but I do hope everyone has a WONDERFUL Valentine's Day!

Sunday, January 29, 2012

Sunday Night Creation

Good Evening!

By this time on a Sunday night, I'm usually exhausted.  Not this Sunday night though - a card I saw in an old Stampin' Up catalog had been floating through my mind all day, so I knew I had to hurry up and make it before I forgot my recipe :)  Here's how it turned out:
Another cricut-less cards!  Oh how my resolution is suffering... I'll make up for it next week - I already have ideas {insert mischevious laugh here}...

A couple of neat things I tried with this card were:
1.) Embossing only the bottom 1.5" of the card base
2.) Only gluing down 1 of the butterfly wings to give them a 3D effect

I left the inside blank for now - I'll stamp something in it once I know who it's going to.

Thanks for looking - Have a good night!

About this card:
Cardstock Base (4"x4") - Stash; Embossed with Floral Fantasy Cuttlebug Folder
Ribbons - Brown Base is seam binding; Beige Lace is from Stampin' Up
Patterned Paper - Fancy Pants - My Family / Mother 
Spellbinders Die - Lacy Squares
Light Blue Cardstock - Papertrey Ink - Spring Rain
Distress Inks - Vintage Photo & Stormy Sky
Butterflies - Making Memories Paper Reverie/Metallique
Pearls - Stash
Edges chomped with my awesome Corner Chomper

Saturday, January 28, 2012

Ahoy!

Ok - I really needed to get out of the funk that the last card left me in, so I did an about-face and created this:
I love the way it turned out - I got to try some new things with this card.  The faux stitching helps the layers look more finished, the glossy accents on the wheel make it look like polished wood, and the patterned paper is from Webster's Pages - I love their papers, but have never had the guts to cut into one till tonight - glad I did!

I'll be entering this card into the following challenges:
Cardz TV Challenge - "It's a Guy Thing"
Die Cuttin' Divas - "Buttons, Bows &/or Bling"
Birthday Sundaes - Challenge #40 - "Birthday Card w/ Sentiment on the Outside"

Thanks for looking - Have a GREAT weekend!

About this Card:

Cardstock Base - Papertrey Ink - Enchanted Evening
Patterned Paper - Webster's Pages - Yacht Club, Whale Watching
Cricut Cut - Wheel from Pack Your Bags, cut at 3.25", with added Glossy Accents
Sentiment - Pink by Design - Summer Vacation  stamped in Staz-on Timber Brown
Buttons, Bling, Ribbon, Hemp Cord - Stash

Wednesday, January 25, 2012

One of Those Days...

Ok, we all have that project that looked so cool in their minds, then really didn't pan out.
Exhibit A:

I don't know where it went wrong... scratch that... I don't know what's right about it.  The colors are not right, the frame layers didn't really line up, the distressing on the frame faded as it dried... Not my favorite card I've ever made.

HOWEVER... I did use 2 different cartridges on this card, so I can cross 2 more off of my Resolution List.  And I'm a HUGE fan of these tiny sentiment stamps that I got from Pink by design - they fit anywhere!  If nothing else, this 'eh' feeling is driving me to something great again.  Hopefully I can stay up late enough tonight to make something!  We'll see...

About this mess:

Card Base: Papertrey Ink New Leaf
Cricut Cuts - Frame - Elegant Edges cut at 3" & Flower - Cindy Loo Cut at 2"
Ribbon - Stash (Recollections)
Sentiment - Pink by Design
Stickles - Lime Green, Cotton Candy, Burgundy, Yellow
Distress Ink - Ranger - Scattered Straw

Thursday, January 19, 2012

Playing with LUSH

Good Evening...

I have a Cricut-less card to share with you tonight!  I bought some gorgeous My Mind's Eye papers from CropChocolate.com, and was inspired by one of the ladies on that website (Credit-StampinHampton) to create this card:
Which opens up to look like this:
I really like the look of mono-chromatic cards, and this line of paper is perfect for making them. I love birds, so I really wanted to make the bird (from the Finch cardstock) the centerpiece of this card - I love how it turned out!

I didn't have anyone special in mind when I made it, so I left the sentiment pretty generic.  I have this paper in about 8 different colors, so don't be surprised if you see more 'mono-chromaticism' from me :)  Sorry, it's late and now I'm making up words... Thanks for looking!

About this card:
Card Base - My Mind's Eye Lush Green Diamonds (11"x5" folded to 5"x5")
Solid Cardstock - Papertrey Ink Ripe Avacado
Patterned Cardstock - My Mind's Eye Lush Green Finch and Lush Large Green Polka Dot
Sentiment - Fiskars All Year Greetings
Ink - Ranger Distress Ink Forest Moss

Wednesday, January 18, 2012

Getting Squirrel-y

Hello again :)

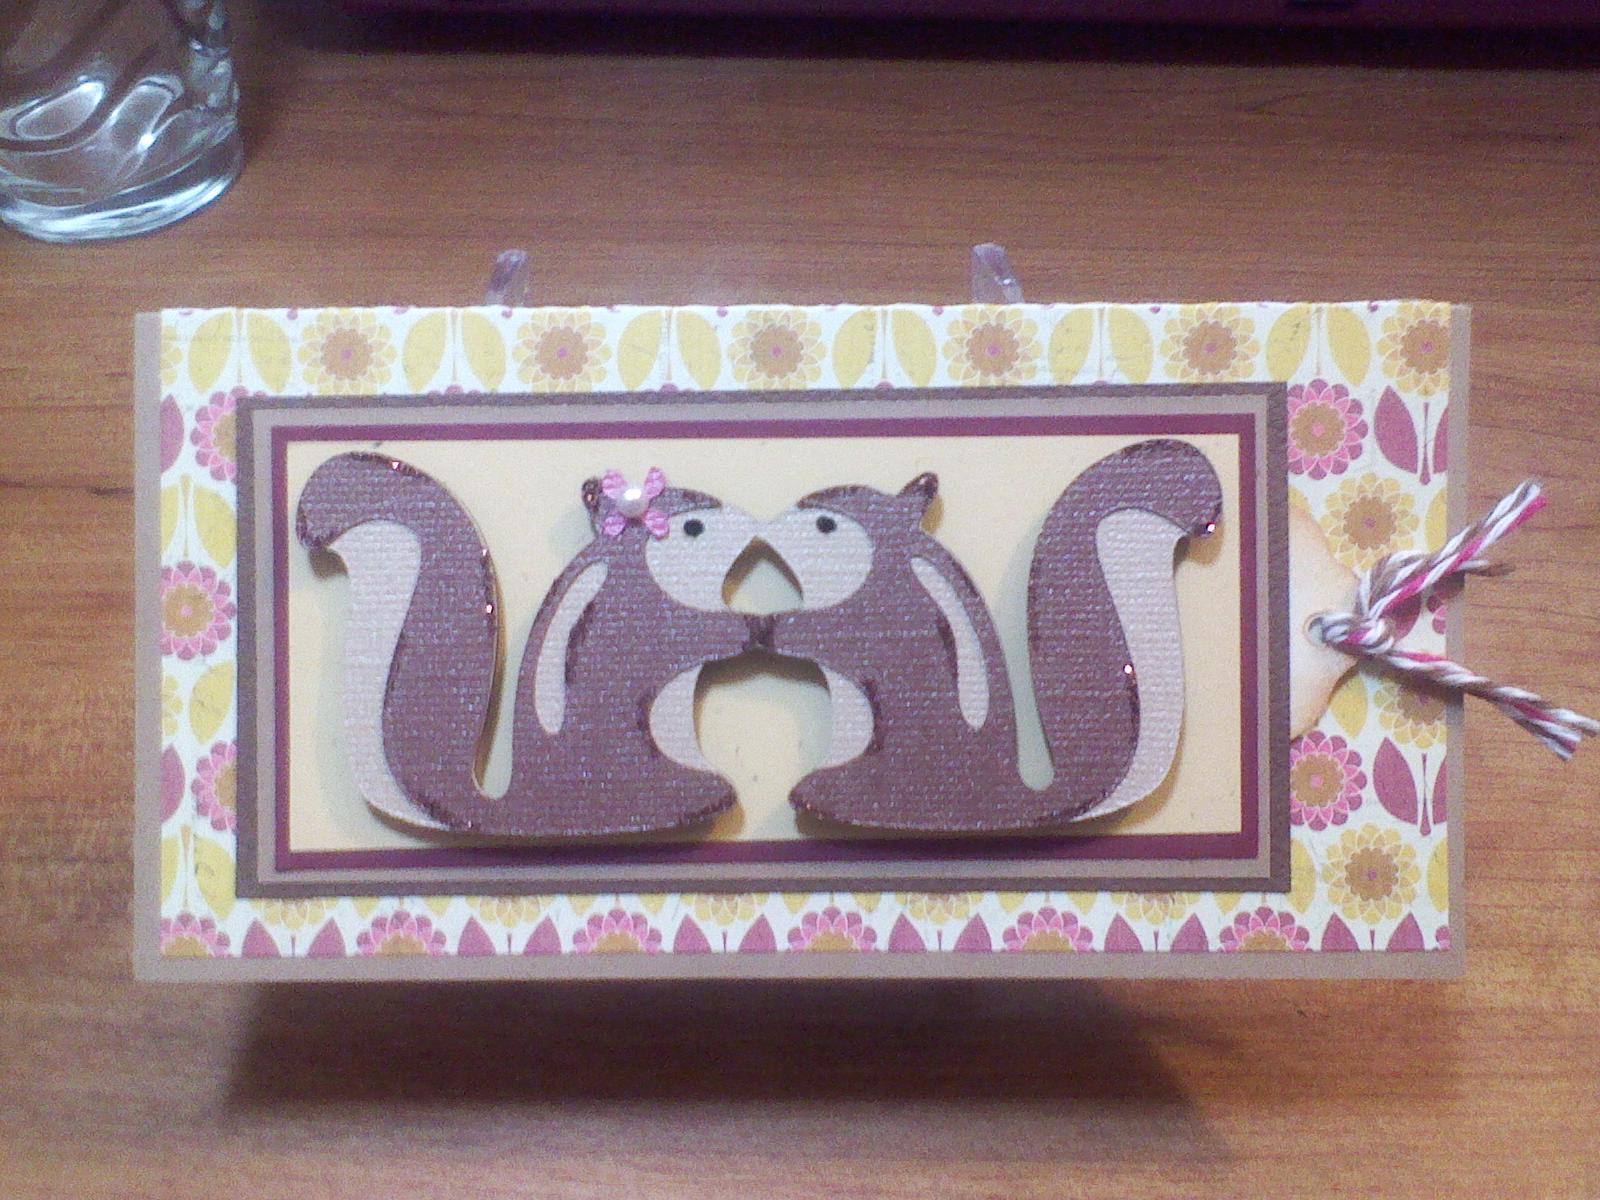
I am REALLY excited to share this card with you, because I just love how it turned out!  I made this card to enter into the challenge going on right now over at Die Cuttin Divas.  The challenge is to make something with a squirrel on it (random fact - Squirrel Appreciation Day is 1/21).  Here's what I came up with:
The tag hiding behind the mat looks like this:
I had never heard of squirrel appreciation day before.  Honestly, I really don't like squirrels - they eat all of the good food I put out in my bird feeders. However, today I do need to be grateful to them for inspiring this cute card.   If you're feeling squirrel-y, hop over to Die Cuttin Divas and try their challenge this week - It'll be fun!

About this card:
Kraft Base 6"x6" (folded in half)
Patterned Paper - Sassafrass Lass - Count Me In
Die Cut Mats - Stash
Cricut Cut - Give a Hoot cut at 1.75"
Stickles - Cinnamon, Black Diamond
Pearl & Twine - Stash
Sentiment - My Pink Stamper Punny-licious
Distress Ink - Tea Dye